あんまり公言するべきではない話だが、実は内職が好きだ。といっても別に家で何か作っているわけではない。会議中とかにこっそりする内職。もっとタチが悪い。
本当は内職を好きでやっているわけではなく、呼ばれなくてもいい会議とかに呼ばれまくって自分の時間が無くなり、環境構築や作業する時間が無くなる。夜中までやればいいといっても時間は有限。会議中にそういう内職をしたくなるのだが、会議中にパスワードの設定でパチパチ入力していたりとかは絶対バレる。またそういう会議に限って、実は重要で内職をしている場合ではなかったりする。
つまり、会議で時間が取られるが自分の仕事も進めなければならない。それが内職となる。この内職には副産物がいくつかあって、
- 構築の自動化ができるので、短時間で構築ができる
- 構築時に発生しうる設定ミス、設定のブレが排除できる
なので、会議中の内職だけではなく、日頃にも役立つ。
その内職だが、オンプレ系の構築って、結構UIの遷移をまって、次の入力となるものが結構多い。その代表がvCenterだと思う。
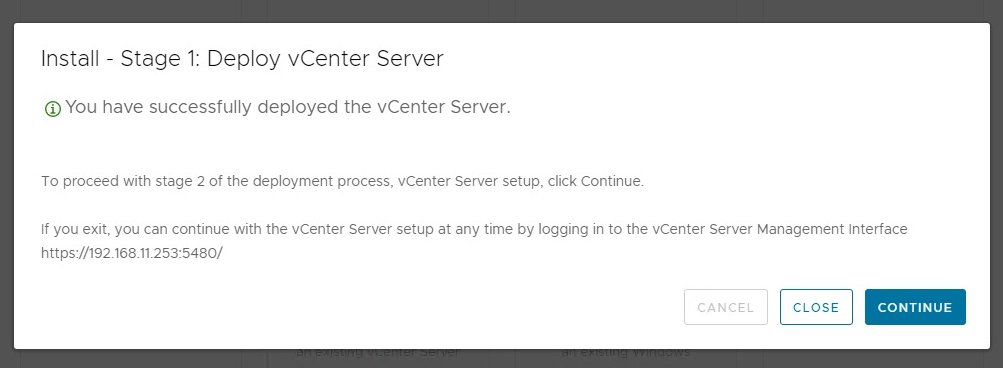
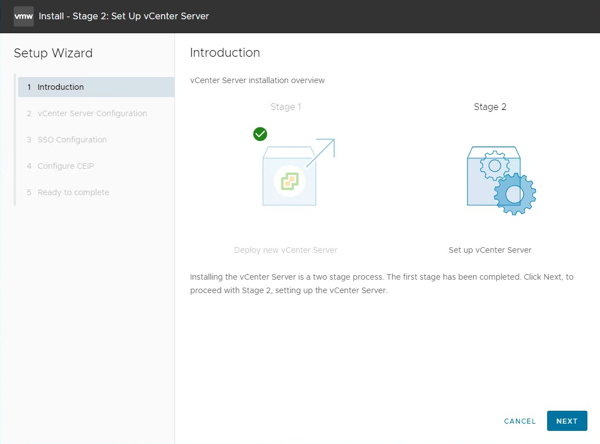
vCenterは、vCenterホストの設定をするStage1、SSOの設定をするStage2があり、Stage1も結構時間がかかった挙句、Stage2の作業がある。
Stage1が終わり。。。

Stage2へ。

はっきり言ってタルい。今回はここら辺を全部自動化してみたい。
閑話休題
Linux環境で説明をするが、各部分をWindows的に置き換えてやれば動作するはずである。
こんな感じでjsonファイルを作成(以下はヒアドキュメントで書いている)する。適宜、vCenterホストやSSOの設定は書き換える。
cat << EOF > ~/vCenter7.json
{
    "__version": "2.13.0",
    "__comments": "Sample template to deploy a vCenter Server Appliance with an embedded Platform Services Controller on an ESXi host.",
    "new_vcsa": {
        "esxi": {
            "hostname": "YOUR_ESXI_HOST",
            "username": "root",
            "password": "YOUR_ESXI_PASSWORD",
            "deployment_network": "YOUR_VM_NETWORK",
            "datastore": "YOUR_DATASTORE"
        },
        "appliance": {
            "__comments": [
                "You must provide the 'deployment_option' key with a value, which will affect the vCenter Server Appliance's configuration parameters, such as the vCenter Server Appliance's number of vCPUs, the memory size, the storage size, and the maximum numbers of ESXi hosts and VMs which can be managed. For a list of acceptable values, run the supported deployment sizes help, i.e. vcsa-deploy --supported-deployment-sizes"
            ],
            "thin_disk_mode": true,
            "deployment_option": "tiny",
            "name": "vCenter7"
        },
        "network": {
            "ip_family": "ipv4",
            "mode": "static",
            "system_name": "192.168.11.253",
            "ip": "192.168.11.253",
            "prefix": "24",
            "gateway": "192.168.11.1",
            "dns_servers": [
                "127.0.0.1"
            ]
        },
        "os": {
            "password": "YOUR_VC_HOST_PASSWORD",
            "ntp_servers": "YOUR_NTP_SERVER",
            "ssh_enable": true
        },
        "sso": {
            "password": "YOUR_VC_PASSWORD,
            "domain_name": "vsphere.local"
        }
    },
    "ceip": {
        "description": {
            "__comments": [
                "++++VMware Customer Experience Improvement Program (CEIP)++++",
                "VMware's Customer Experience Improvement Program (CEIP) ",
                "provides VMware with information that enables VMware to ",
                "improve its products and services, to fix problems, ",
                "and to advise you on how best to deploy and use our ",
                "products. As part of CEIP, VMware collects technical ",
                "information about your organization's use of VMware ",
                "products and services on a regular basis in association ",
                "with your organization's VMware license key(s). This ",
                "information does not personally identify any individual. ",
                "",
                "Additional information regarding the data collected ",
                "through CEIP and the purposes for which it is used by ",
                "VMware is set forth in the Trust & Assurance Center at ",
                "http://www.vmware.com/trustvmware/ceip.html . If you ",
                "prefer not to participate in VMware's CEIP for this ",
                "product, you should disable CEIP by setting ",
                "'ceip_enabled': false. You may join or leave VMware's ",
                "CEIP for this product at any time. Please confirm your ",
                "acknowledgement by passing in the parameter ",
                "--acknowledge-ceip in the command line.",
                "++++++++++++++++++++++++++++++++++++++++++++++++++++++++++++++"
            ]
        },
        "settings": {
            "ceip_enabled": false
        }
    }
}
EOF
ISOイメージをマウントして、vcsa-cli-installerのvcsa-deployを実行する。
./vcsa-deploy install --accept-eula --acknowledge-ceip --no-ssl-certificate-verification ~/vCenter7.json
少し待つと、こんなメッセージが表示される。

実は、この時点ですでにStage 2が終わっている!!!
これをスクリプト化をすれば完全に自動でvCenterが構築できる。内職完了。