久しくBind でDNSを立てなくなくなった。Bindの設定がかなり面倒な上にセキュリティ対策して設定を書く必要があり、さらに最新にアップデートしておかないとすぐにハックされちゃう。動けば楽しいんだけどねぇ。過去にハックされたこともあるし。sendmailのmcファイルの作成とともにちょっと、このご老体には堪える。。。まぁ書かないことはないけど、あえて今は選択はしない。もちろん、書け!、作れ!と言われたらやりますが。。。お仕事のご依頼お待ちしてます(爆)
閑話休題
DNSはもっぱらAWSに移行しちゃった。それほどクェリーが来るわけでもなく、API使えるので便利。しかし、ドメインを持ったら証明書が欲しい。今httpsのサイトじゃないとブラウザからアクセスしにくいので。証明書だったら、庶民の味方であるLets Encryptが便利。Synologyもデフォルトで使えちゃうからな。ただ普通につくるとホスト証明書なので、ホストごとに証明書をとらなきゃならない。ちと面倒。なので、いっそのことワイルドカード証明書を取ることにする。ワイルドカード証明書だったらいろいろ使えるので。ただ、自動更新しても手動で差し替えということも必要になるのでホスト証明書の便利さには欠ける。外に出れるIPアドレスもそんなにもってはいないし。
前提条件としては
- Ubuntu 18.04 LTS
- Awsコマンドがインストールされていて、それなりの設定がされている
ということで。個々の設定はググってください。暇があれば書くかもしれないけど。また例によって覚書モード
# Certbotグループの作成 (AWSCERTBOTgroup)
aws iam create-group –group-name AWSCERTBOTgroup
{
“Group”: {
“Path”: “/”,
“GroupName”: “AWSCERTBOTgroup”,
“GroupId”: “AAAAAAAAAAAAAAAAAAAA”,
“Arn”: “arn:aws:iam::123456789123:group/AWSCERTBOTgroup”,
“CreateDate”: “2019-05-24T14:11:21Z”
}
}
aws iam list-groups
{
“Groups”: [
{
“Path”: “/”,
“GroupName”: “AWSAdmins”,
“GroupId”: “AXXXXXXXXXXXXXXXXXXX”,
“Arn”: “arn:aws:iam::123456789123:group/AWSAdmins”,
“CreateDate”: “2019-03-10T08:49:13Z”
},
{
“Path”: “/”,
“GroupName”: “AWSCERTBOTgroup”,
“GroupId”: “AAAAAAAAAAAAAAAAAAAA”,
“Arn”: “arn:aws:iam::123456789123:group/AWSCERTBOTgroup”,
“CreateDate”: “2019-05-24T14:11:21Z”
},
{
“Path”: “/”,
“GroupName”: “AWSDRgroup”,
“GroupId”: “BXXXXXXXXXXXXXXXXXXX”,
“Arn”: “arn:aws:iam::123456789123:group/AWSDRgroup”,
“CreateDate”: “2019-05-24T06:05:49Z”
},
{
“Path”: “/”,
“GroupName”: “AWSS3group”,
“GroupId”: “CXXXXXXXXXXXXXXXXXXX”,
“Arn”: “arn:aws:iam::123456789123:group/AWSS3group”,
“CreateDate”: “2019-03-10T14:03:06Z”
}
]
}
# zoneidの確認
aws route53 list-hosted-zones | jq -c -r ‘.HostedZones[]|[.Name,.Id]’
[”hogehoge.net.”,”/hostedzone/ZAAAAAAAAAAAAAA”]
[”hogehoge.tech.”,”/hostedzone/ZBBBBBBBBBBBBBB”]
# Certbotポリシーの作成
# certbot.jsonとしておきます。ZoneID ZAAAAAAAAAAAAAAとZBBBBBBBBBBBBBBを指定
cat << EOF >> certbot.json
{
“Version”: “2012-10-17”,
“Id”: “certbot-dns-route53 sample policy”,
“Statement”: [{
“Effect”: “Allow”,
“Action”: [
“route53:ListHostedZones”,
“route53:GetChange”
],
“Resource”: [
“*”
]
},
{
“Effect”: “Allow”,
“Action”: [
“route53:ChangeResourceRecordSets”
],
“Resource”: [
“arn:aws:route53:::hostedzone/ZAAAAAAAAAAAAAA”
“arn:aws:route53:::hostedzone/ZBBBBBBBBBBBBBB”
]
}
]
}
EOF
ls -l certbot.json
-rw-rw-r– 1 tmase tmase 581 5月 24 14:12 certbot.json
aws iam create-policy –policy-name CertbotPolicy –policy-document file://certbot.json –description “Certbot Policy”
{
“Policy”: {
“PolicyName”: “CertbotPolicy”,
“PolicyId”: “DXXXXXXXXXXXXXXXXXXX”,
“Arn”: “arn:aws:iam::123456789123:policy/CertbotPolicy”,
“Path”: “/”,
“DefaultVersionId”: “v1”,
“AttachmentCount”: 0,
“PermissionsBoundaryUsageCount”: 0,
“IsAttachable”: true,
“CreateDate”: “2019-05-24T14:13:23Z”,
“UpdateDate”: “2019-05-24T14:13:23Z”
}
}
#certbot.jsonは要らないので削除
rm certbot.json
#作成確認
aws iam list-policies –query Policies[][] –scope Local
[
{
“PolicyName”: “CertbotPolicy”,
“PolicyId”: “DXXXXXXXXXXXXXXXXXXX”,
“Arn”: “arn:aws:iam::123456789123:policy/CertbotPolicy”,
“Path”: “/”,
“DefaultVersionId”: “v1”,
“AttachmentCount”: 0,
“PermissionsBoundaryUsageCount”: 0,
“IsAttachable”: true,
“CreateDate”: “2019-05-24T14:13:23Z”,
“UpdateDate”: “2019-05-24T14:13:23Z”
}
]
# Certbotのポリシーをグループに適用します。適用にはarnを指定します。
aws iam attach-group-policy –group-name AWSCERTBOTgroup –policy-arn arn:aws:iam::123456789123:policy/CertbotPolicy
# Certbotユーザの作成 (awscertbotuser)
aws iam create-user –user-name awscertbotuser
{
“User”: {
“Path”: “/”,
“UserName”: “awscertbotuser”,
“UserId”: “EXXXXXXXXXXXXXXXXXXX”,
“Arn”: “arn:aws:iam::123456789123:user/awscertbotuser”,
“CreateDate”: “2019-05-24T14:14:37Z”
}
}
aws iam get-user –user-name awscertbotuser
{
“User”: {
“Path”: “/”,
“UserName”: “awscertbotuser”,
“UserId”: “EXXXXXXXXXXXXXXXXXXX”,
“Arn”: “arn:aws:iam::123456789123:user/awscertbotuser”,
“CreateDate”: “2019-05-24T14:14:37Z”
}
}
# CertbotユーザをCertbotグループに所属させる
aws iam add-user-to-group –group-name AWSCERTBOTgroup –user-name awscertbotuser
aws iam list-groups-for-user –user-name awscertbotuser
{
“Groups”: [
{
“Path”: “/”,
“GroupName”: “AWSCERTBOTgroup”,
“GroupId”: “AAAAAAAAAAAAAAAAAAAA”,
“Arn”: “arn:aws:iam::165819414948:group/AWSCERTBOTgroup”,
“CreateDate”: “2019-05-24T14:11:21+00:00”
}
]
}
# Certbotユーザのアクセスキーを作る (必ずコピペする)
# コンソールログインは不要なので、コンソールログインの権限は与えません。
aws iam create-access-key –user-name awscertbotuser
{
“AccessKey”: {
“UserName”: “awscertbotuser”,
“AccessKeyId”: “AYYYYYYYYYYYYYYYYYY”,
“Status”: “Active”,
“SecretAccessKey”: “CXXXXXXXXXXXXXXXXXXXXXXXXXXXXXXXXXX”,
“CreateDate”: “2019-05-24T14:15:31Z”
}
}
#certbot-dns-route53のインストール
#apt で、python3-certbot-dns-route53/bionic 0.23.0-1 を入れてもいいが、なぜかcertbotが古い。。。
sudo -I
#pipが入っていなければ
apt -y install python3-pip
#certbot-dns-route53をインストールする。アップグレードのコマンドだが入っていなければインストールしてくれる。
pip3 install –upgrade certbot-dns-route53
一度ログアウトして、ログイン
# 確認
which certbot
/usr/local/bin/certbot
certbot –version
certbot 0.34.2
certbot plugins
– – – – – – – – – – – – – – – – – – – – – – – – – – – – – – – – – – – – – – – –
* dns-route53
Description: Obtain certificates using a DNS TXT record (if you are using AWS
Route53 for DNS).
Interfaces: IAuthenticator, IPlugin
Entry point: dns-route53 = certbot_dns_route53.dns_route53:Authenticator
* standalone
Description: Spin up a temporary webserver
Interfaces: IAuthenticator, IPlugin
Entry point: standalone = certbot.plugins.standalone:Authenticator
* webroot
Description: Place files in webroot directory
Interfaces: IAuthenticator, IPlugin
Entry point: webroot = certbot.plugins.webroot:Authenticator
– – – – – – – – – – – – – – – – – – – – – – – – – – – – – – – – – – – – – – – –
ちゃんとroute53をサポートしている!
# rootじゃないので、ホームディレクトリにcertbotディレクトリを作成
cd
mkdir -p certbot/conf
mkdir certbot/work
mkdir certbot/log
# certbot実行
hogehoge.techの場合
certbot certonly \
–dns-route53 \
–force-renew \
–rsa-key-size 4096 \
–server https://acme-v02.api.letsencrypt.org/directory \
-m adminmember@hogehoge.tech \
-d hogehhoge.tech \
-d *.hogehoge.tech \
–agree-tos \
–config-dir certbot/conf \
–work-dir certbot/work \
–logs-dir certbot/log
hogehoge.netの場合
certbot certonly \
–dns-route53 \
–force-renew \
–rsa-key-size 4096 \
–server https://acme-v02.api.letsencrypt.org/directory \
-m root@hogehoge.net \
-d hogehoge.net \
-d *.hogehoge.net \
–agree-tos \
–config-dir certbot/conf \
–work-dir certbot/work \
–logs-dir certbot/log
以下出力例
Saving debug log to /Share/certroot/certbot/log/letsencrypt.log
Found credentials in shared credentials file: ~/.aws/credentials
Plugins selected: Authenticator dns-route53, Installer None
– – – – – – – – – – – – – – – – – – – – – – – – – – – – – – – – – – – – – – – –
Would you be willing to share your email address with the Electronic Frontier
Foundation, a founding partner of the Let’s Encrypt project and the non-profit
organization that develops Certbot? We’d like to send you email about our work
encrypting the web, EFF news, campaigns, and ways to support digital freedom.
– – – – – – – – – – – – – – – – – – – – – – – – – – – – – – – – – – – – – – – –
(Y)es/(N)o: n
Obtaining a new certificate
Performing the following challenges:
dns-01 challenge for hogehoge.net
dns-01 challenge for hogehoge.net
Waiting for verification…
Cleaning up challenges
Non-standard path(s), might not work with crontab installed by your operating system package manager
IMPORTANT NOTES:
– Congratulations! Your certificate and chain have been saved at:
/Share/certroot/certbot/conf/live/hogehoge.net/fullchain.pem
Your key file has been saved at:
/Share/certroot/certbot/conf/live/hogehoge.net/privkey.pem
Your cert will expire on 2020-07-25. To obtain a new or tweaked
version of this certificate in the future, simply run certbot
again. To non-interactively renew *all* of your certificates, run
“certbot renew”
– Your account credentials have been saved in your Certbot
configuration directory at /Share/certroot/certbot/conf. You should
make a secure backup of this folder now. This configuration
directory will also contain certificates and private keys obtained
by Certbot so making regular backups of this folder is ideal.
– If you like Certbot, please consider supporting our work by:
Donating to ISRG / Let’s Encrypt: https://letsencrypt.org/donate
Donating to EFF: https://eff.org/donate-le
certbot/conf/live/hogehoge.net/にプライベートキー、証明書、中間証明書、フルチェーン証明書が生成される。
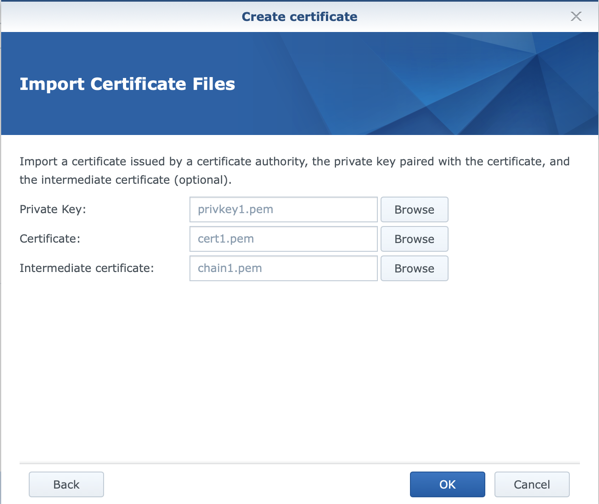
設定例サンプル:Synologyの証明書で登録する場合は、以下のように指定。

#更新
certbotディレクトリがあるところで実行
cd
ls
certbot
certbot renew \
–config-dir certbot/conf \
–work-dir certbot/work \
–logs-dir certbot/log
#cronの設定
自動的に更新させる方法
cd
cat << ‘EOF’ > certbot.sh
#!/bin/bash
cd
certbot renew \
–config-dir certbot/conf \
–work-dir certbot/work \
–logs-dir certbot/log
EOF
chmod +x certbot.sh
certbotの初回出力結果をみて、crontabを作る。2ヶ月に1回実行させたい。awsコマンドが使えるユーザじゃないとダメ。
rootユーザになり、
crontab -e -u USERNAMEでcrontを登録
crontabの設定は以下が便利
https://crontab.guru/
例
次回更新が2020-07-25の場合、以下を登録。2ヶ月おきに実行
0 0 24 1,3,5,7,9,11 * /Path/certbot.sh > /dev/null 2>&1
登録したら以下で確認
crontab -l -u USERNAME
#SSLの確認
もし、インターネットから参照可能であれば、ここでセキュリティを含めた動作確認が可能になる。
https://www.ssllabs.com/ssltest/index.html